The Cairngorms from Creag Bhalg – ‘On the trail of the lonesome pine’
For the best viewing experience, left-click the images and maps to zoom in to a new window, then exit that window to go back – go on, it really does work!
Our September 2022 trip to the Scottish Highlands was a trip of two halves, with the good weather of our ‘Behind Liathach’ day (see post #330) replaced by bad weather that drove us to the East Coast for some respite (see post #331). Then, just as the expedition was about to draw to a close, the weather took a turn for the better in the Cairngorms – it was time to head back to the hills.
The Cairngorms – our Creag Bhalg walk in blue, bottom rightThe route and Upper Deeside
The mass of the Cairngorms is a major barrier to travel in Eastern Highlands of Scotland. The range is about 60 kms x 40 kms of high country, crossed only by ancient valley tracks or wild mountain paths. This effectively means that there are two main bases to explore the mountains – either the Aviemore side to the north or the Braemar side to the southeast. We were already on the East Coast, so it made sense to head for Braemar, and a little-known hill called Creag Bhalg.
Closer view of the route, starting at Mar Lodge
I had been saving Creag Bhalg for an ‘iffy’ weather day, and it soon became obvious that ‘iffy’ was going to be about right. The high Cairngorm plateau, about 1100-1200 metres in altitude, attracts weather described as Arctic in winter. Even September can bring life-threatening weather conditions, but Creag Bhalg, at 668 metres, was likely to be a little more benign – it was also reputed to be a good viewpoint for the main Cairngorm mountains. So, Creag Bhalg it was to be.
The Victoria Bridge, giving access to Mar Lodge and Creag BhalgPassing by the estate buildingsMar Lodge, seen from the west on our return routeMar Lodge – the ‘Big Hoose’
There are two logical ways to approach Creag Bhalg, either by the Linn of Dee (see post #258) or by Mar Lodge. I fancied the Mar Lodge option, mainly for its place in the history of mountaineering and climbing – in the 1960s-70s there was a public bar at the Lodge, frequented by the climbing fraternity as well as estate workers, stalkers, ghillies and campers. Some of the tales have become the stuff of legend, but alas no longer. The Lodge and estate are now both owned by the National Trust of Scotland, the house converted to holiday lets and the wild, impromptu ceilidhs of yesteryear are just a memory.
Setting out through woodland ….…. with the path finally opening upFly agaric growing on the path ….…. adding a splash of colour
We didn’t have time to ceilidh on this trip, as our wee hill was still waiting for us! After passing Mar Lodge, we set off through woodland before the path finally opened up to give wider views towards the mountains. Fungus fans would have been impressed by the fine array of fly agaric toadstools growing by the path, adding a splash of colour to the heather.
Looking across the valley towards the Upper Dee valleyThe view to the west with Glen Lui and Derry LodgeHeading towards the summit of Creag Bhalg ….…. passing by ‘the lonesome pine’
The weather looked as if set to be fair, but there were glowering clouds out to the west, heading towards Glen Lui and Derry Lodge. I had done a bit of research on Creag Bhalg, and one feature I was looking out for as a navigational marker was a lone Scots pine. Sure enough, as we turned towards the upper slopes of the hill, it was there – we were on ‘the trail of the lonesome pine’!
Looking south to Inverey and Glen EyThe view northwest towards Derry Cairngorm and Ben MacduiWay marker cairn on the way to the summit, with Beinn a Bhuird (centre) to the northAt last! The summit cairn of Creag Bhalg comes into view
As we got closer to the summit, the clouds got closer to us, and we did have the odd shower of rain, mixed in with clear spells and long views towards the main Cairngorm mountains. The potential of Creag Bhalg as a viewpoint towards the cairngorms was apparent, and if the hill was modest in size, it was worth the trip just for the panoramas.
Nearly there ….…. all 668 metres of itCloud rolling in over the Cairngorm plateau
We didn’t linger at the summit, as it was on the cool side for September, and after a few quick photos, it was time to head down. We took a slightly different descent route, taking us round the other side of Mar Lodge – it all looks very tidy and civilised now, but I bet the fabled ‘stag ballroom’ could tell a few tales of the golden age of Cairngorm climbing.
Bow Fiddle Rock, off the Moray Coast of North East Scotland
For the best viewing experience, left-click the images and maps to zoom in to a new window, then exit that window to go back – go on, it really does work!
North East Scotland, with Ben Rinnes (blue circle) and Portgordon (red circle)Closer view of Speyside in North East Scotland
Although September is usually a month of fine, settled weather in the Scottish Highlands, we didn’t have much luck there on our September 2022 trip. Unbeknown to us at the time, our trip out round the hidden northern side of Liathach (see post #330) was to be one of our few ‘good weather’ days. When the wind and rain arrived, we headed east, eventually aiming for Speyside, an area famous for its single malt whisky, but otherwise unfamiliar to us.
If Speyside is well known for its whisky, it’s less well known for its lofty mountain peaks, but a little research came up with an interesting looking mountain day, in the shape of Ben Rinnes. At a height of 840 metres (2755 ft), Ben Rinnes wasn’t quite one of the lofty peaks we had come to the Highlands for, but it would do fine in the circumstances. That was until the squally showers of the West Highlands caught up with us – we bailed out and headed for Portgordon on the coast.
Plenty of bird action at Chanonry Point, RosemarkieGannet diving for fish, RosemarkieAgile gannet, about to dive
Now, this is a blog about mountain days, with photos of mountains and stories about mountains, but occasionally a change of scene looks like a good idea, especially when the weather prevents you from even seeing the mountains! A couple of days earlier we had been at Rosemarkie on the Black Isle, hoping to see dolphins at Chanonry Point – it was a ‘no-show’ by the dolphins, but a fine display of fishing by the local gannets had been a consolation prize.
Not so agile cormorants, dozing at Portgordon HarbourNot much action with the Portgordon seals eitherIt’s all just too much trouble!
The wildlife at Portgordon was a bit less lively, in fact there wasn’t much going on at all with the harbour cormorants and seals, but Portgordon is that kind of a place, a haven of peace where we could park up and decide what Plan B was going to be. Plan B turned out to be a drive along the coast to the village of Cullen, home of the famous Cullen Skink, a thick soup of smoked haddock, potatoes and onion. It wasn’t the soup that grabbed our interest though, it was the amazing rock arch known as Bow Fiddle Rock.
The route from Cullen (red circle) to Bow Fiddle Rock (green circle)One of the ‘Three Kings of Cullen’Two of the ‘Three Kings’Heading out from Cullen BayThe Moray Coast TrailOne of many caves along the Trail, both on land ….…. and in the sea
Our route started from the golf course on the edge of Cullen village, near to the rock stacks known as ‘The Three Kings’ – from there, a pleasant beach walk along the Moray Coast Trail led us across Cullen Sands, before the path narrowed as it wandered past caves, both on land and in the sea. The folding and erosion of the cliffs along the path was quite spectacular, but the natural sea arch of Bow Fiddle Rock is the real star.
First view of Bow Fiddle Rock – not immediately obvious ….…. until you turn the cornerLooking down from the cliff path ….…. and a closer view from the stony beach
I’m sure that some readers will want to know that the quartzite rock which forms the arch is between 539 and 1,000 million years old, and that the rocks were folded when the ancient continents of Laurentia and Avalonia collided roughly 400 million years ago. Since then, the rocks have become exposed and eroded by sea and weather to give us Bow Fiddle Rock as it is today. However, most of us will be happy enough just to see the amazing rock formation – it might not be a lofty peak, but it was well worth the short walk to see it.
Time to head back – Cullen village in the afternoon sunshine
I spent some time with the camera, despite the light being a bit less than amazing – to be honest, I was thankful it wasn’t pouring down, as it had been on Ben Rinnes. We returned to sleepy Portgordon for an overnight stop and were rewarded with a memorable sunset – when it comes to weather, you sometimes have to make your own luck.
Walking through Coire Mhic Nobuil – ‘Behind Liathach’
For the best viewing experience, left-click the images and maps to zoom in to a new window, then exit that window to go back – go on, it really does work!
The North West Highlands of Scotland – Torridon at the red cross
Most years we end up in Torridon in Wester Ross on our Scottish trip. It’s a mountain walkers paradise, with ‘proper’ mountains that don’t take prisoners, and my usual companion for the big mountain days had been Border Collie ‘Mist’. In her final year, the high peaks were getting to be too much, even for a willing Border Collie, so I had come up with a route that would be easy enough for the dog and interesting enough for the humans.
The route ‘Behind Liathach’ – from west (left) to east (right)
Over the past few years, I had come to realise that a hiking day through the mountains could be as worthwhile as one over the tops. One such trip in Torridon had been planned with the senior dog in mind – a linear route passing the northern side of Liathach, the side that the tourists don’t see, linking Coire Mhic Nobuil to Coire Dubh Mor. In other words, it was ‘Behind Liathach’. ‘Mist’ passed away in June 2022, so our trip in the following September was our first one without a dog in years. The ‘Behind Liathach’ route was still waiting to be done though.
The route – Start/finish at the red circle, taxi route out in black, the walk back in blue
Being a linear route, there was one small problem of logistics to sort out – the interesting bit through the mountains was almost 12kms (7½ miles) but 10.5kms of road lay between the start and finish points. The answer was simple – get a taxi to the start point (we had done this in 2018 on a 18km walk between the Skye Cuillins and Blabheinn – see post #248). A phone call put us in touch with Donald, who as well as sorting out the taxi, gave us the inside story on Callum the stag.
Local Torridon resident and Facebook celebrity, Callum the stagWildlife meets modern human – which one is the dumb creature!
Callum had turned up in Torridon about six years earlier, in a poor state of health. Several locals had started taking buckets of vegetables out to the semi-emaciated stag, and he had bounced back to health. Before long, he had become a local attraction, and tourists were using Facebook to find out where they could see Callum. Sadly, the rescue mission by the locals has become a bit of a circus, with people forgetting that they are dealing with a wild animal, not a Disney character. It’s amazing that no one has been injured – yet!
Meet the family – the missus and babyCloser view of the calfThe rutting call – almost as old as the hills
In the meantime, Callum now has a Mrs Calum and Baby Callum (and yes, the name can be used for females as well as males). We were in Torridon at the end of September, marking the start of the rutting (mating) season. Although Callum is a bit of an ‘old boy’ now, hundreds of years of evolution tell him it’s time to find more females for his harem, and we were frequently treated to Callum’s rutting bellow, though I’m not sure treated is the correct word – if you can imagine what a noisy chainsaw sounds like, you are on the right track.
Our start point and the start of Coire Mhic Nobuil ….…. Setting out through shadowy woods ….…. before bursting into the light, with the hills of Beinn Alligin aboveHeading out up Coire Mhic Nobuil….…. with Beinn Dearg ahead
So, on our taxi ride to our start point at the start of Coire Mhic Nobuil, we were given a history of Callum and family, along with other fascinating local stuff – taxi drivers are brilliant at that sort of thing. Once at our destination, we were soon ready to start our wee trek. One nice thing about being taxied to a start point is that there is a sense of commitment – our camper was about 12kms away along mountain tracks, so if we wanted to eat that night, we would have to get moving!
Bridge over the Abhainn (River) Coire Mhic NobuilThe hills of Beinn Alligin, seen from near the footbridgeBeinn Dearg getting closer (left) with a distant view of Beinn Eighe (right)Now Beinn Eighe (ahead) getting closer, and Liathach peeping out on the right
As it was, we had great weather for the trip, and good light for photographs. The path rising through Coire Mhic Nobuil was a typical stalkers path taking the most efficient route through the hills. The main attraction early on was the bunch of hills known collectively as Beinn Alligin – once past Alligin, we traversed below Beinn Dearg and eventually an old friend in the form of Beinn Eighe came into view (see posts #230 and #246).
A final view back to Beinn Alligin ….….with Beinn Eighe ahead getting ever closerThe Am Fasarinan Pinnacles on the Liathach ridge, on the south side of our routeThe lump of Sail Mhor (Beinn Eighe) looming ahead
OK, so this wasn’t exactly a ‘thrill seeking’ kind of a day – what we did get for our efforts was a pleasant wander through some of the most dramatic mountain scenery in the UK. And what’s more, we didn’t see a soul! With Beinn Alligin and Beinn Dearg behind us, the path entered a bealach (pass) with Liathach and its pinnacles on one side and the huge bulk of Sail Mor marking the start of the Beinn Eighe hills.
The cairn marking the fork in the path leading to Coire Mhic FhearchairThe wild lonely corrie of Coire Mhic Fhearchair, seen in 2017
Soon after we started the descent of Coire Dubh Mor, we passed the cairn marking the path out to Coire Mhic Fhearchair, a magnificent lonely corrie that we have visited before and will almost certainly visit again (see post #227). That wasn’t the plan for this trip though – the steady familiar descent of Coire Dubh Mor soon brought us back to the camper and our noisy neighbour, Callum.
For us, it’s time to head for home ….…. and our noisy neighbour
Looking southwest over Llyn Gwynant, with Moel Hebog rising in the distance
For the best viewing experience, left-click the images and maps to zoom in to a new window, then exit that window to go back – go on, it really does work!
The Snowdonia National Park, now more correctly referred to as Parc Cenedlaethol Eryri, recently made the decision to use the Welsh names for Snowdon (Yr Wyddfa) and Snowdonia (Eryri) instead of the English forms. About time too – I’ve been ahead of the game in using the Welsh (or should I say Cymraeg) name for the mountains for some time now, after all we don’t call Mont Blanc ‘the White Mountain’, do we? Australia’s ‘Ayers Rock’ is now Uluru, ‘Mount McKinley’ in Alaska is now Denali, so it’s been long overdue to give Yr Wyddfa its proper name.
Closer view of Moel Hebog, seen from just outside Beddgelert
Some of the Cymraeg names of the mountain ranges of Eryri are easy enough to recognise for us English speakers, such as Carneddau for Carnedds, Glyderau for the Glyders and Moelwynion for the Moelwyns, and personally I think that they sound more interesting and romantic when the Welsh name is used, but one mountain range that might have English speaking hikers scratching their heads over is Eifionydd.
North Wales, with the walk start point at the blue cross
The main problem for English speakers is often in the pronunciation of the Welsh language, but once you know a few basic rules, Cymraeg is far more predictable than Scots Gaelic, for example. So, try saying Eifionydd as ‘Eye-vi-on-ith’ – not perfect phonetically, but a Welsh speaker would recognise what you were saying. The range lies to the west of Beddgelert, Rhyd Ddu and Tremadog and the main highlight for many is Moel Hebog (‘Bare Hill of the Hawk’) above Beddgelert.
Moel Hebog, with the start point (blue cross) and Owain Glyndwr’s cave (red cross)Closer view of the route
I’ve had a few trips out on Moel Hebog over the years (see posts #93 and #164) and I’ve usually gone for the continuation ridge route over Moel yr Ogof and Moel Lefn, but this time the intention was to cut down to the east side of Moel yr Ogof to make a shorter walk for Chris and to try to spot the cave reputed to have been used by Welsh rebel (or hero depending on your point of view) Owain Glyndwr whilst hiding from pursuit by the English.
Setting out near Beddgelert …. …. with Moel Hebog rising aboveAt last – getting a bit closer ….….with the northeast view looking towards Yr Wyddfa (Snowdon) ….…. and the southeast view looking towards the mountains of the Moelwynion (Moelwyns)
Our route set off from Beddgelert, with Moel Hebog initially hidden from view – the ascent doesn’t seem to make much headway at first, but after a while the ‘Bare Hill of the Hawk’ starts to look a bit closer. If I’m honest though, at this point the best views are towards Yr Wyddfa to the northeast and the mountains of the Moelwynion to the southeast.
After looking at the views, it’s time to get stuck in to the ascent ….…. with Beddgelert now looking a long way behind
Eventually, things start to get a bit steeper, and Beddgelert starts to look a long way behind. I had forgotten that there are a couple of short rock scrambles on the higher section – these aren’t technically difficult but slowed Chris down enough for me to offer her the security of a confidence rope. I didn’t have to offer twice, and after a short scrabble in my pack for the rope, we were moving again – the bit that unnerved Chris was no more than a couple of moves, but better a short delay to deploy the rope than a long delay (or worse) if she had slipped.
Finally – The summit with views over Bae Tremadog (Tremadoc Bay) looking south ….….and the Nantlle Ridge to the north (Moel yr Ogof the nearest peak below and left)
And then it’s all over, with the summit coming into view. The view down to the sea at Tremadog was a bit hazy, but the view north to the magnificent Nantlle Ridge (see post #21) made up for that. From the summit viewpoint, it’s possible to spot (haze allowing) just about all of the mountains of Eifionydd including Mynydd Mawr (see post #30) to the north of Nantlle.
The descent from Moel Hebog, with Moel yr Ogof below on the leftBelow the East Face of Moel yr Ogof ….….with Ogof Owain Glyndwr (Owain Glyndwr’s Cave) peeping out
Having finished with the mountain spotting, it was time to start to head down. At the col between Moel Hebog and Moel yr Ogof, we swung to the east to go round Moel yr Ogof instead of my usual route over the top. This gave us a view up the steep east side of the mountain towards Ogof Owain Glyndwr (Owain Glyndwr’s cave). Caves seem to be fairly popular with fugitive national heroes such as Glyndwr, Robert the Bruce or Bonny Prince Charlie, but far be it for me to undermine a local legend, it seemed to be a mucky scramble to reach an exposed hole in the crag.
The descent continues, with a bit if minor bushwhacking
Heading up to the cave had not been on the menu for the day, though I think it would soon have been vetoed had I suggested it to Chris. Instead, we cut down through the forest on narrow paths that almost qualified as minor bushwacking, before we hit the wide forest ride that joins the Rhyd Ddu–Beddgelert bridleway. It was time to head for home.
For the best viewing experience, left-click the images and maps to zoom in to a new window, then exit that window to go back – go on, it really does work!
Over the space of forty years, I had nearly been up Wild Boar Fell twice. Both occasions were on training sessions with Penrith and Kirkby Stephen Mountain Rescue Teams, and both times the exercise incident was concluded before I got anywhere near the summit. The thing is, there isn’t much else on the west side of the Mallerstang valley other than Wild Boar Fell – if I wanted the summit, I was going to have to make a special trip. That special trip had to wait until August 2022.
The northern end of the Yorkshire Dales National Park, with Wild Boar Fell in the centre
Wild Boar Fell stands alone, refusing to be tied down to a popular area. The mountain is in Cumbria, but Cumbria is the Lake District National Park, isn’t it? Wild Boar Fell is actually part of the Yorkshire Dales National Park, but refuses to join in with being part of Yorkshire – if you really must tie things down, it’s at the very head of the Eden Valley, which starts in Mallerstang before taking a 100-kilometre wander through Kirkby Stephen, Appleby and Langwathby, before finally reaching the sea beyond Carlisle. That will do then – it’s in Eden.
Wild Boar Fell (route in blue) and the Howgill Fells
Although alone, Wild Boar Fell does have notable neighbours, these being the Howgill Fells. For over sixty years, Wild Boar Fell and the Northern Howgills did not have National Park status – that changed in 2016, with a good bit of Cumbria becoming part of the Yorkshire Dales NP. It isn’t as daft as it sounds – the present county might be Cumbria, but until 1974 this was Westmorland. So, we’re in the Garden of Eden in the lost county of Westmorland.
The route – anti-clockwise from the blue cross
Our plan was to walk over the mass of Wild Boar Fell from north to south, starting in Mallerstang to make a circular route of around 11 kilometres (7 miles). One thing that was quite certain was that we wouldn’t see many other hikers – these hills don’t get a lot of pedestrian traffic, possibly because of their ambiguous location. There aren’t many bragging points in saying that you have been wandering in Eden. However, before heading for the Wild Boar, we had another visit in mind – we were going to visit red squirrels.
Red squirrel at Snaizeholme
The red squirrel is native to the British Isles and for 10,000 years was widespread here. In the 1800s, the grey squirrel was introduced from America as a ‘pretty’ addition to country estates. It wasn’t realised at the time that the greys are highly destructive to forestry, as well as out-competing the native reds. Reds are still to be found in Scotland, but in England and Wales they have barely clung on. There are several sanctuaries where reds can still be found, and the day before our meeting with the Wild Boar, we went to visit the Snaizeholme squirrels.
Main occupations in life –Eating! And looking pretty
Snaizeholme is near to Hawes in Wensleydale, and the lack of forested hills in the area makes it more difficult for the greys to colonise – they simply don’t have the corridors of trees leading to the areas populated by the reds. The Yorkshire Dales NP and local landowners have co-operated to provide a sanctuary at Snaizeholme, where these normally shy creatures can be seen on a regular basis, and although you can’t rely on wild creatures turning up to order, there’s always a good chance of seeing reds here.
Setting out near to Aisgill, with Wild Boar Fell in the centreLooking back, with the Settle-Carlisle railway in the valleyOn the way out ….…with constantly changing views of Wild Boar Fell above
The next day found us parked up near Aisgill in Mallerstang. At 708 metres altitude (2323 ft), Wild Boar Fell is the fifth highest peak in the Yorkshire Dales NP after Whernside, Ingleborough, Great Shunner Fell and near neighbour High Seat, but as our start point was about 300 metres, we had a bit of height advantage. Before long we were exchanging views of the Settle-Carlisle railway for the eastern escarpment of Wild Boar Fell.
Starting up the broad northern ridge ….…. with The Nab coming into view (the two tiny figures in the centre give an idea of scale)Looking north down the ridgeApproaching The Nab ….…. with the collection of ‘stone men’ (cairns) coming into view
It is said that wild boar lived on the fell up to 500 years ago. It is also said that the wild boar tusk kept in the church at nearby Kirkby Stephen came from the last boar to be hunted and killed on the fell. Whatever, you won’t find wild boar there nowadays – what you will find though, is a collection of ‘stone men’, otherwise better known to UK hillwalkers as cairns.
The diversion to the cairns near High White ScarAt the cairnsThe summit of Wild Boar Fell, with the Howgill Fells beyondA zoom view of Cautley Spout, about 8 kms (5 miles) to the west
A visit to the cairns took us away from the path to the summit, but seeing that it had taken me forty years to get this far, I thought it a good idea to make a visit, as I might not be around in another forty years! That being done (and a fine collection of cairns they are), Chris and I wandered about 500 metres across to a neat stone shelter at the summit, with great views west to the Howgill Fells. Full zoom on the camera brought the impressive waterfalls of Cautley Spout into view (see post #16) though it does help if you know what you are looking for and where to look.
Heading south from the summit of Wild Boar Fell ….…. with Swarth Fell aheadLooking back ti Wild Boar Fell ….…. with the collection of cairns visible near High White Scar
Clear visibility made the descent south from the summit easy to navigate, and after a little over 3 kms it was time to turn left to follow the line of Far Cote Gill back to the valley, and our start point. We had different views of Wild Boar Fell as we started down, but one of the best views of the day was the combination of the fell and the Mallerstang Valley seen in the afternoon sun. I’m still a bit surprised it took me forty years to get round to it.
Time to start the descentA final view of Wild Boar Fell and Mallerstang valley – time to head for home
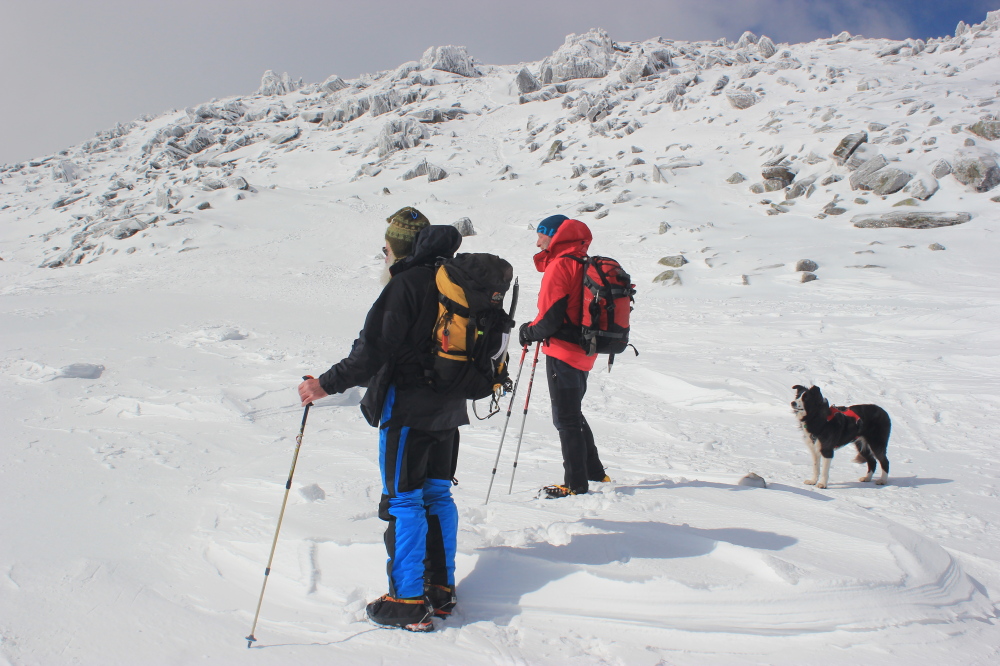
A little bit late with the blog this week – I’ve been working away from home on the Spine Race, as safety cover in a remote Pennine bothy. The bothy and its Spine Race occupants have become part of the Spine mythology, but today I can come out and say it was me who first named our Greg’s Hut safety station the ‘Highest Noodle Bar in the UK’
Every year, John Bamber and I set up the ‘Noodle Bar., offering noodles (with or without John’s chili!), a brew and occasionally a shoulder to cry on if needed. Our only companions over the years have been some excellent doctors and medics, some of who actually volunteered to come out here, plus my Border Collie ‘Mist’, sadly no longer with us.
This post first went out in 2013 – I’m reprising this one last time, mainly for newcomers to the Spine Race, who perhaps know little of the history of the race, but also for regular readers of this blog who may have missed it, and wonder why I disappear every January (except during Covid lockdowns).
So, settle back and read the story of the first two editions of the Spine Race, and the inauguration of the Highest Noodle Bar in the UK.
Two men and a dog ….. and the highest noodle bar in the UK (JB)Greg’s Hut in January, altitude 700 metres – outlook bleak!
“Do you fancy a couple of days up at Greg’s Hut in January?”
If anyone other than John Bamber had asked the question, I would probably have answered with a reply that included sex and travel! For those who don’t know it, Greg’s Hut is a bothy, high on the flanks of Cross Fell in the Pennines. At 700 metres altitude, it can be cold and cheerless in summer, so the prospect of staying there in a Pennine winter was not on my short list of ‘Fun Things To Do’. Why did I say, “Sounds like a good idea” ? … Ask the dog ….
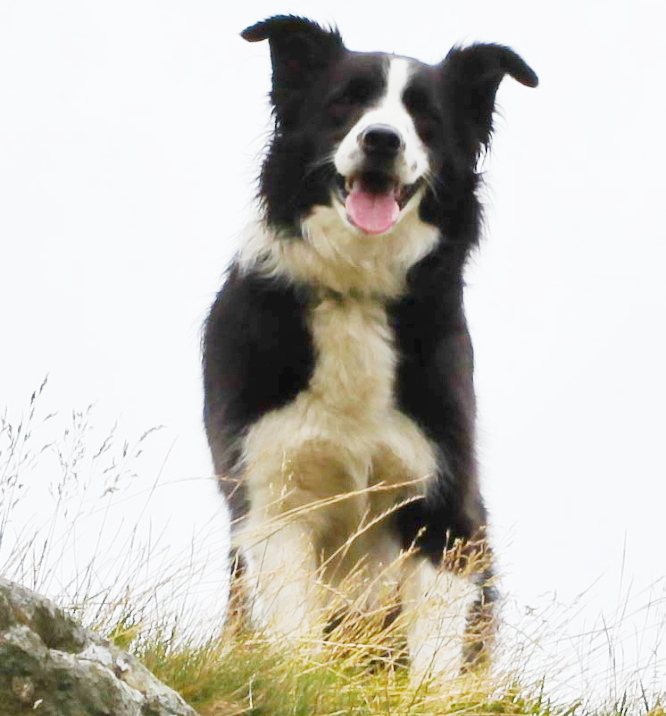
Ask the dog ….Having fun in Snowdonia …. (JB)
…. with the man with the beard
Never just an ordinary day out! (JB)
Mist – “I’m getting used to the boss and his daft schemes, but I know there’s something going on when his mate John (the bloke with the big beard) turns up. Don’t get me wrong, John is a lot of fun, and I’ve had some great hill days with him, but it’s never going to be just an ordinary day out. I suppose that’s why the boss said yes to the Greg’s Hut trip – those two are both as daft as each other! Mind you, when they said I could go as well, I was packed and ready before them!”
Setting out on the Greg’s Hut recce for the first Spine Race 2012
It was autumn 2011, and John had signed up as one of the Support Team for the first ‘Spine Race’ to be held in January 2012 – not having anything better to do, I said that I would join him. We decided that it might be a good idea to do a recce beforehand – I hadn’t been to the bothy in over twenty years, and John hadn’t seen it at all, so a check on luxuries such as a functioning roof seemed to be a good idea.
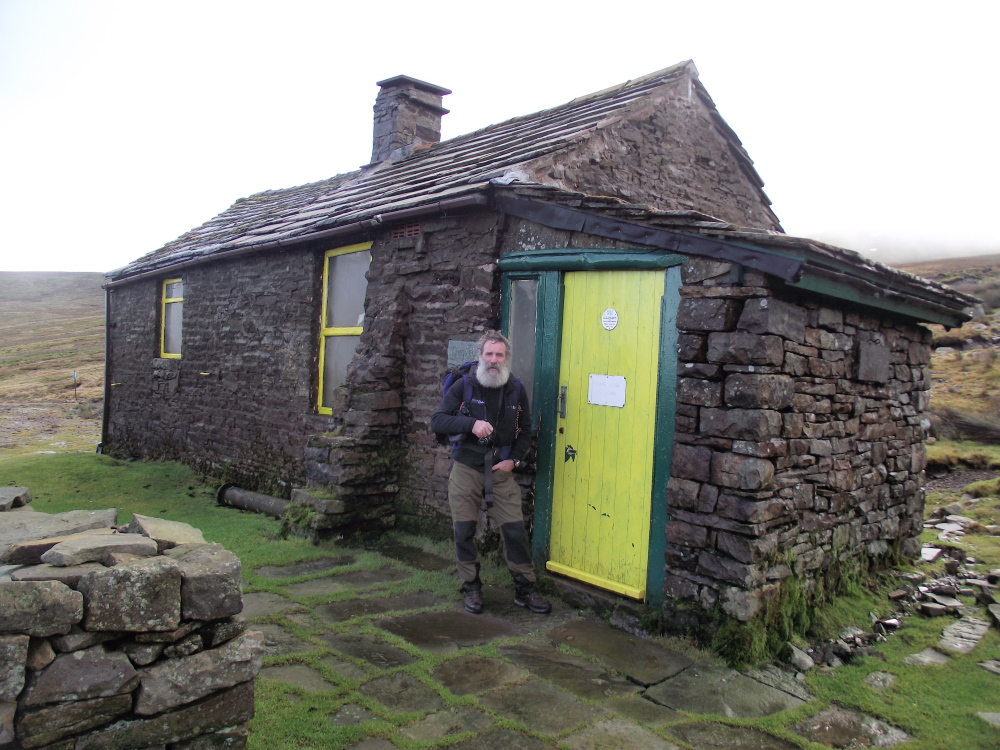
Greg’s Hut – roof intact!
Mist – “Haha … I still remember that walk! I always think that the boss carries too much when we are in the hills – a bag of dog biscuits is all you really need if you think about it – but John turned up with this stuff called ‘coal’ in his rucksack. It certainly looked heavy, and I was laughing all the way to the hut. Humans never cease to amaze me ….!”
Spine Race start line 2012
John sets up the highest Noodle Bar in the UK
Two happy customers – 2012 winners Gary Morrison and Steve Thompson
Yes, it’s true, John carried about 10 kilos of coal in on that trip. Just over a week later we were back again, with John setting up what was probably the highest ‘Coffee and Noodle’ bar in the UK – if it wasn’t the highest, it was certainly the most difficult to get to. We had four visitors out of sixteen original starters, with the Hall of Fame including joint 2012 winners Gary Morrison and Steve Thompson, followed later by Mark Caldwell and Andy Collister. Those guys had to work to get their noodles!
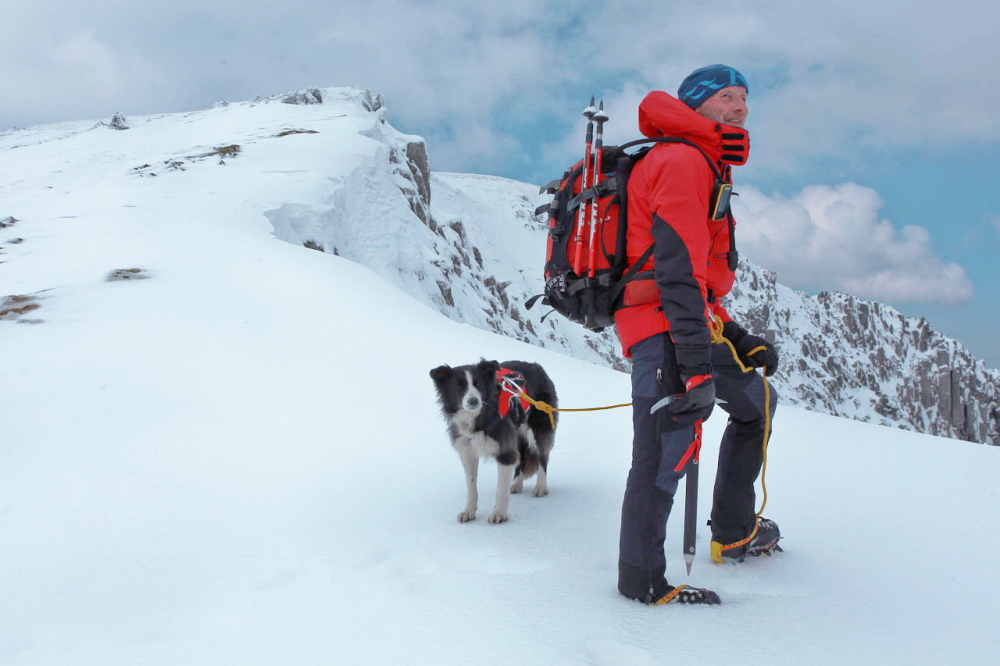
Spine Race start line 2013‘Mist’ search training in Snowdonia (DH)
CP 1.5 at Malham Tarn (JB)
‘Mist’ and I were not at the start line for the 2013 event – we had a race of our own to run. Whilst 47 elite athletes were starting the race at Edale, ‘Mist’ was completing her obedience and stock safety tests to begin training as a search and rescue dog with SARDA (Search And Rescue Dog Association) Wales. The two of us made the grade and were accepted as a trainee search team, and on the Sunday evening we set off from North Wales to catch the race up at CP 1.5 at Malham Tarn.
Life in the big dog kennel (JB)
Mist – “Laugh!! I nearly wet meself! John (the one with the big beard, remember – pay attention at the back!) – John had brought this huge kennel along (I think he called it a tent, but I know what a kennel looks like – I AM a dog, after all). Anyway, it snowed all night, and I had a great time chasing snowballs around, but it didn’t look like a lot of fun in that kennel, what with loads of cold, wet humans in there. John was having fun, though”
2012 – backpacking the gear to Greg’s Hut
2013 – travelling in style (JB)
Yet again, John showed the world that an extremely large dump of snow was not going to interrupt his new career of ‘extreme noodle chef’. Having sent all the happy customers on their way, we then set our sights on our old friend, Greg’s Hut. The previous year we had to backpack all our gear in, assisted by a group of porters who didn’t hide quickly enough when we went looking for help – this time we had a ride up the hill track in Phil’s 4X4.
‘Johnnie’s Noodle Bar’ open and ready for business (JB)
Mist – “Yes, that was quite a trip – just as well we had the help, ‘cos I didn’t fancy carrying in two days worth of dog biscuits! John must have had a brainstorm, ‘cos the week before he carried up twice as much of that black stuff (coal, isn’t it?!) to the hut – didn’t we all fall about laughing when we arrived and found that it had all gone!!”
Racers leaving Greg’s Hut …. (JB)…. with a long, cold run ahead (JB)
It’s true – over the space of a week, someone had either used or pinched 20 kilos of coal from one of the most deserted places south of the Scottish border. If they burned it in the stove, they must have inaugurated the highest sauna in the UK – if it was pinched, I hope they suffered a hundred bad backs carrying it away! A re-supply carried us through, and ‘Johnnie’s Noodle Bar’ was open for business once again.
A busy night at ‘Johnnie’s Noodle Bar’ (JB)
All good things have to come to an end though, and in less than two days the surviving athletes had passed through ‘Greg’s’ – time to hit the road again. After a day at Bellingham we set off for the finish line at Kirk Yetholm. However, there was a cloud on the horizon – in fact there were lots of clouds, accompanied by a storm warning from the Met Office. Our little corner of the UK was about to get a visit from Mr Snow!
Mist – “Snow? I should say so! Some of the time you couldn’t see your paw in front of your face!”
Just before the blizzard arrived (JB)Heading for the finish (JB)
People who say that they have been in a blizzard in the UK are usually mistaken – a heavy snow fall with a bit of wind ‘doth not a blizzard make’. However, having been in a couple of blizzards over the years, I can confirm that THIS was a blizzard! What’s more, we still had two teams out on the final ridge of the Cheviots. These are ‘little’ hills, around 500-700 metres in altitude, but sometimes latitude means as much as altitude, with the latitude of the Cheviots being about the same as that of Moscow.
Last group to finish, heads held high (JB)
The next day the storm had passed. The two groups had done exactly the right thing, and had gone to ground in two different mountain refuges on the ridge (the term ‘refuge’ is used loosely – think more along the lines of garden sheds). During the night Stu and Joe from the support team had gone up on the ridge for a welfare check, with John and I as backup, and found themselves looking out for their own welfare instead! The ‘garden sheds’ were life savers though, and the next day the two groups mustered themselves and walked off the ridge with heads held high.
The loneliness of the Pennines in winter (JB)
There’s a narrow line between adventure and misadventure, and these athletes know all about that – their performances are frequently heroic, often inspirational. They make the week of the Spine Race an event to look forward to each year, and being a member of the Spine ‘Mountain & Medic’ Support Team is very special to me – that and my part time job as sous chef at the highest noodle bar in the UK.
Mist – “Couldn’t have put it better meself – any noodles left, John?”
(JB – assisted by Naomi Dodds and Olivia Cheetham)
The wild Preseli Hills – on the Golden Road, looking east
For the best viewing experience, left-click the images and maps to zoom in to a new window, then exit that window to go back – go on, it really does work!
Southwest Wales, with the Preseli route in the centre
If you are reading this, wondering where on earth the Preseli Hills are, you will be in good company. The highest point in these little-known Pembrokeshire hills, is Foel Cwmcerwyn, a mere 536 metres (1759 ft) in altitude, and the upland areas are grassy, rolling moors with occasional rocky tors. For many, these tors are the major interest – 4000 years ago, some of these rocks were transported 140 miles (225km) to become part of Stonehenge, a major feat of logistics at any time in history!
A closer view of Mynydd Preseli (The Preseli Mountains) – 2014 route in red, right of the blue route
This was a second visit to Preseli for Chris and I – in 2014 we had walked part of an ancient roadway known as the Golden Road (the 2014 route shown in red in the above map). It’s possible that the Golden Road may have been one of the original Ridgeways of Britain, used in prehistory to avoid the dense forests in the valleys, but it is also believed to have been used 5000 years ago by Neolithic travellers, trading gold mined in the Wicklow Mountains of Ireland with Wessex. Whatever, it’s old!
The route, clockwise from Rosebush in the bottom left
Our trip wasn’t going to involve any gold trading; it was a ‘filling in the gaps’ route to include part of the Golden Road that we had missed out in 2014. Our base was the village of Rosebush, a Welsh village with a well-known pub where customers in the bar are encouraged to order their drinks in the Welsh language. Ironically, the village name is English – Rosebush is assumed to be an anglicised version of the Welsh Rhos y Bwlch, which means the Pass of the Moor.
Setting out from RosebushHeading up towards Pantmaenog ForestThe view looking backFoel Cwmcerwyn ahead, the highest of the Preseli peaks at a lofty 536 metresThe summit trig point …. …. with the author getting in the action as a model!
Virtually all our height gain on the route was in the first 3kms from Rosebush to the summit of Foel Cwmcerwyn – lowland fields with sheep led us to a prominent track heading up to Pantmaenog Forest. Beyond there, the ground started to look more like moorland, rather than farmers’ fields, and a steady walk took us almost 300 metres higher than our start point in the village, to the summit trig point at 536 metres altitude.
Heading from Foel Cwmcerwyn towards the main Preseli ridge and the Golden RoadThe next objective in the distance – Foel Feddau, 467 metres in altitudeThe final slopes of Foel Feddau ….…. before reaching the summit
Views from Foel Cwmcerwyn were extensive and included a good bit of our intended route. Foel Feddau was our next hill feature, and a faint path across the moor took us in the right direction. A small amount of descent was followed by some minor uphill before arriving at our second summit and its Bronze Age burial cairn, probably around 4000 years old.
Next objective -the ridge just left of centre ….…. and the faint path leading to itTypical Preseli scenery ….…. with rock tors scattered aboutLooking back to where we had come from ….…. with Foel Feddau in the centre and Foel Cwmcerwyn on the left
From there it was moorland wandering, pleasant enough in good weather but probably a bit more challenging in bad weather conditions. The route was picked to get some distance back in our legs, after being restricted to shorter walks for a while. 15kms wasn’t exactly earth-shattering, but ‘it gets you out of the house’ as the saying goes. 5kms of that was on a quiet road, but that gave ample opportunity to brush up on my Welsh for the Tafarn Sinc pub – “peint a hanner o seidr, os gwelwch yn dda” would do nicely (“a pint and a half of cider, please” if you are struggling with that!).
Time to head for home ….….before arriving here – Tafarn Sinc at Rosebush
Well, this is going out on Boxing Day 2022, a day when UK hikers, hillwalkers, mountaineers and climbers traditionally head out for the hills and mountains to walk off that extra helping of turkey and Christmas pud, so I’ll save the next blog post for a couple of weeks.
So, what are you waiting for, get those boots out! See you back here in a couple of weeks.
The Southern Carneddau – Carnedd Dafydd on the left with Pen yr Helgi Du on the right in the distance
For the best viewing experience, left-click the images and maps to zoom in to a new window, then exit that window to go back – go on, it really does work!
Eryri (Snowdonia) with the mountains of the Carneddau in the centre
If you are a regular reader, you would probably have seen the recent post (see post #320) which announced that my Border Collie ‘Mist’ had died at the respectable age of 14. After ‘Mist’ was cremated, Chris and I distributed some of her ashes on our local dog walks near home, but I had made plans to take ‘Mist’ for one last walk in the mountains of the Carneddau.
The Carneddau, showing the routeCloser view of the route
Before moving to North Wales in 2012, I hardly knew the Carneddau, but since then these mountains have become one of my favourite areas to walk. (If you search on Carneddau in the Blog page search box, you will probably find enough posts to fritter away half a morning!) Just the place for a final dog walk, and I knew exactly where I would be going.
Looking up towards Pen yr Ole Wen (left) and Cwm Lloer ….…. and looking across the valley to a cloud-draped TryfanThe East Ridge of Pen yr Ole Wen coming into view‘Mist’ in Cwm Lloer – December 2012
The Carneddau range covers quite an area, so there was a lot to go at. One of my favourite trips, and one that ‘Mist’ had always accompanied me on, is the circuit of mountains starting with Pen yr Ole Wen via its East Ridge, then continuing above Cwm Lloer to Carnedd Dafydd. From there, on to Carnedd Llewelyn, the highest peak in the Carneddau, before heading down to Pen yr Helgi Du, and returning to the valley via Y Braich.
The rock band on the East Ridge – the short scramble is in the left-leaning groove, just to the left of centreThe short scramble – no problem if you have opposing thumbs!
A bit more of a problem if you only have doggie paws! (July 2014)
Looking down the scramble
The East Ridge of Pen yr Ole Wen has a rock band that appears from below to block further progress, but there’s a lovely little scramble that has only one defect – it’s too short! It has its moments though, especially if you have paws instead of opposing thumbs, and I always used to put a harness and rope on ‘Mist’ instead of risking an accident. On a traverse of the range from Ogwen to Conwy in 2014 (see post #160) I reported that “the last time we came this way, ‘Mist’ had struggled a bit getting up the rock obstacle – I can now report that her rock climbing standard has gone up by at least a grade, and at one point the dog overtook me, making this her first lead on a rock route!”
Once past the scramble, it’s a steady plod to the summit of Pen yr Ole WenTryfan, now cloud freeCarnedd Dafydd (just left of centre) seen from Pen yr Ole Wen
Once above the rock step, it’s a steady plod to the top of Pen yr Ole Wen, where I scattered some of Mist’s ashes on the summit. I had planned to do the same by the summit cairn of Carnedd Dafydd, where she would usually try to mug me for one of my sandwiches, but a group of young Mountain Leader trainees had taken over the top, so rather than have a bit of dog grit land in their sarnies, I did the decent thing and moved about 25 metres downwind.
From Carnedd Dafydd, the route passes above the cliffs of Ysgolion Duon. Irregular patches of cloud were blowing in and out, but it’s a route I know well, and I only stopped once to check the direction of travel, in the middle of a particularly dense bank of fog. Before long the hill cloud began to clear as I headed upwards to Carnedd Llewelyn.
Carnedd Llewelyn ahead ….….with a view across to Pen yr Helgi Du, the last summit of the South Carneddau CircuitAbove Craig yr Ysfa with Pen yr Helgi Du ahead – just the rock step to sort outLooking back to the rock step – note the figure dead centreLooking back to Craig yr Ysfa, with Carnedd Llewelyn hidden in the cloud
Carnedd Llewelyn was my third location to leave some of ‘Mist’ behind – that being done, I started heading down the gradually narrowing ridge that crosses above the climbers’ crag of Craig yr Ysfa. Another rock band provides a bit more amusement requiring some ‘hands on’ scrambling – ‘Mist’ always found a quicker way down this than I did, probably by following the scent of others, but this time I had to find my own route.
The lonely summit of Pen yr Helgi Du – just two sheep for company
From the rock band, the route heads in a southerly direction, crossing the ridge of Bwlch Eryl Farchog before heading up to the final summit of Pen yr Helgi Du, where I left my last bit of ‘Mist’ behind, sharing the summit with two sheep. From there, it’s an easy return to the valley down the broad ridge of Y Braich, a route I’ve followed several times before with ‘Mist’, but this time I was heading down alone – it was time to head for home.
The way down – the broad ridge of Y Braich in July 2014Time to head for home
Looking down to Camas Ghaoideil, the bothy roof just visible (see next photo)Same view with the bothy circled
For the best viewing experience, left-click the images and maps to zoom in to a new window, then exit that window to go back – go on, it really does work!
The North West Highlands of Scotland, Arisaig in the centre
If you wait for good weather in the Scottish Highlands, you can spend a lot of time doing just that – waiting! Some of our best fine-weather experiences in the Highlands have been in May, but the 2022 version of May wasn’t playing the game, and ambitious hiking plans were postponed for better days. It wasn’t just the weather that dictated the trips out though – we also had to find routes that were not too taxing for Border Collie ‘Mist’, now over 14 years old.
Closer view, showing the Arisaig area
Despite her age, the old dog still became excited when the walking boots came out, and we made sure we got out every day, whatever the weather. On the occasions when better weather came along, we looked for outings suitable for ‘Mist’ but also interesting for the humans, and we always managed to find something. The ‘something’ in this trip was a little known bothy known as Carlotta’s Eyrie, near Arisaig.
The Route out to Carlotta’s Bothy
You can find the answer to many things by using Google, but don’t bother trying to find out more about Carlotta’s bothy, because there’s little info out there. During the Second World War, the Special Operations Executive used this part of the Highlands to train agents, who were then infiltrated into occupied Europe, and ‘Carlotta’ is thought to have been a trainee saboteur. Other than that, nothing is known about the mysterious bothy constructor.
Looking out to Loch nan Caell after setting out from ArisaigA walk through the trees near to the start, with ‘The Canal’ next to usFurther on, by Loch Dubh, with the track starting to deteriorate ….…. until it finally vanished in the mud (Border Collie ‘Mist’ not much impressed)
Our route for the day wasn’t in any way mysterious as we set out from Arisaig village by the sea loch, Loch nan Caell. On this occasion, Google did tell us why the stream running alongside our route was called ‘The Canal’ – it had been widened to float timber from a steam-driven sawmill to the sea. That must have been some time ago as the stream is now slowly reverting to being just a stream. Beyond there, the track steadily deteriorated, eventually becoming a muddy path that even ‘Mist’ tried to avoid.
As we gained height, we left the worst of the mud behind. We were looking out for a ‘cup and ring’ stone dating to the Neolithic to Late Bronze Age (4000-500 BC) but failed in our task – we did, however, find an amazing tumbledown tree which had been blown over but was still growing vertically from the horizontal trunk. Local legends about the stone say that an apprentice blacksmith could gain additional skill and strength by washing his hand in the largest cup mark on the stone – I hope they had more luck in finding it than we did.
Looking down to the bay of Camus Ghaoideil, with the bothy roof peeping outThe bothy indicated by the circleThe bothy, seen from the stony beachA closer view of the bothy
Beyond the tree, the ground dried out a bit, and a gradual slope took us down to the stony beach at the bay of Camus Ghaoideil. The bothy is on a rocky outcrop above the beach, which became more obvious as we approached, but I ended up on a false start, looking down to the short climb onto the outcrop. It is said that time spent in reconnaissance is never wasted – the outcome of this recce was that Chris and ‘Mist’ would not be visiting Carlotta’s little hideaway.
First view of the scramble up to the bothy, looking down from the false start!Second try – approaching from belowOver the scramble, and the bothy comes into view
Chris isn’t much into climbing things that you might fall off, and ‘Mist’ was too old to be mucking about on steep rock, so I left the two of them on a grassy bank, while I skirted round the outcrop to the start point of a scrappy little scramble up a shallow groove – good holds were provided by the tree roots and cracks in the rock, but a handy-looking rope dangling down the groove was also put to good use. Once up, a scrabble about over a rock slab led to the door of the bothy.
Inside now, the entrance behind and window on the rightThe sleeping platform – room for two or threeThe stove (at bottom right)The view from the window
This isn’t one of those bothies big enough for a happy bunch of hikers to hold an impromptu ceilidh, but it’s cosy enough for 2-3 if they are good friends, more if the floor was used for sleeping. I didn’t stay too long as Chris and ‘Mist’ were still on their grassy bank, so after grabbing a few photos, I reversed the Indian rope trick to descend the groove. After a coffee and a sandwich, we set off to return by the way we had come – it was time to head for home.


